free statistics

🍰 Caramel Cream Cheese Pound Cake – A Rich, Velvety Dessert You’ll Love

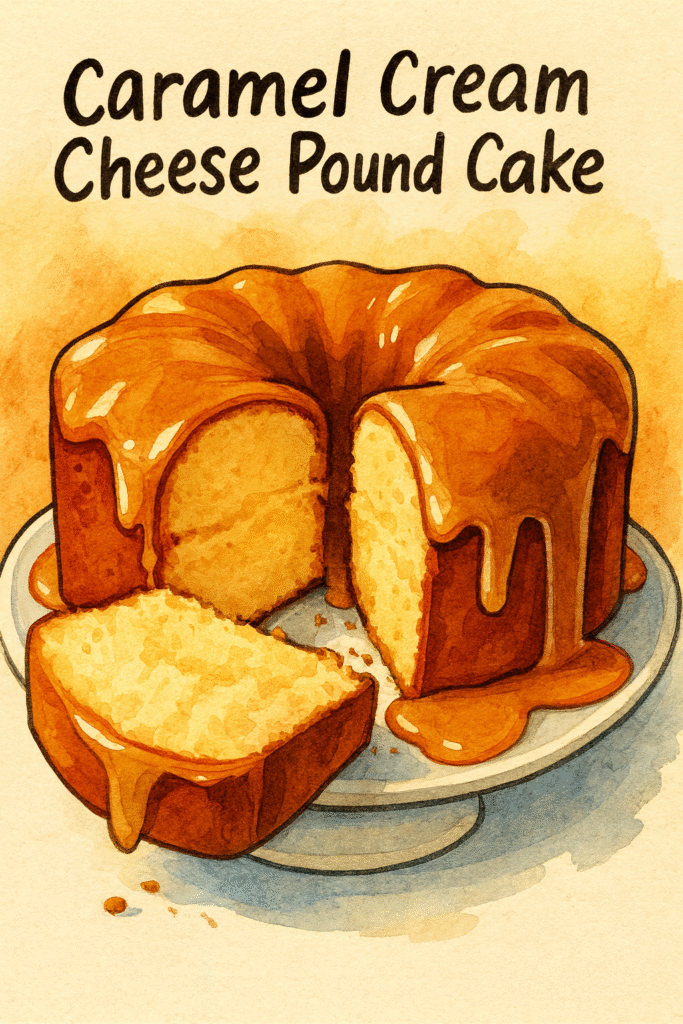
If you’re searching for the perfect combination of buttery richness, silky cream cheese, and decadent caramel, this Caramel Cream Cheese Pound Cake is a show-stopping dessert guaranteed to impress. With its moist crumb, smooth texture, and irresistible caramel glaze dripping down the sides, this cake is ideal for holidays, celebrations, potlucks, or any time you want a luxurious homemade treat.

This recipe delivers bakery-quality flavor with simple ingredients and straightforward steps—making it accessible for beginners and loved by experienced bakers alike.


⭐ What Makes This Pound Cake Special?

Unlike a traditional pound cake, this version incorporates cream cheese for a velvety, moist texture that stays soft for days. The buttery base pairs perfectly with the sweetness of granulated sugar and the richness of eggs. Topping it all is a glossy caramel glaze that adds depth, shine, and an irresistible finish.

It’s a classic cake elevated with premium flavors—ideal for family gatherings, dessert tables, and gifting.


🛒 Ingredients for the Cake

  • 1 cup unsalted butter, softened
    Provides richness and structure.

  • 8 oz cream cheese, softened
    Creates a moist, creamy crumb.

  • 2 ½ cups granulated sugar
    Sweetens and helps achieve the perfect golden crust.

  • 6 large eggs, room temperature
    Essential for texture and stability.

  • 3 cups all-purpose flour
    Forms the base of the pound cake.

  • 1 tsp baking powder
    Adds a light lift without compromising density.

Optional: vanilla extract, salt, caramel topping, or homemade caramel glaze.


👩‍🍳 How to Make the Caramel Cream Cheese Pound Cake

1. Prepare Your Pan and Oven

  • Preheat your oven to 325°F (165°C).

  • Grease and flour a Bundt pan or tube pan to prevent sticking.

2. Cream the Butter, Cream Cheese, and Sugar

  • Using a stand mixer, beat softened butter and cream cheese until smooth and fluffy.

  • Add sugar gradually and continue mixing until the mixture becomes pale and airy.
    This step is key for achieving the perfect pound cake texture.

3. Add the Eggs

  • Add eggs one at a time, mixing well after each addition.

  • Scrape the bowl to ensure even blending.

4. Mix in Dry Ingredients

  • Sift flour and baking powder together.

  • Gradually add to the wet mixture on low speed.

  • Mix only until combined—do not overmix.

5. Bake to Perfection

  • Pour the batter evenly into the prepared pan.

  • Bake for 70–85 minutes, or until a toothpick inserted into the center comes out clean.

  • Allow the cake to cool for 10 minutes in the pan before transferring to a rack.


🍮 Add the Caramel Glaze

Once the cake is cool, drizzle a generous amount of caramel sauce over the top.
You can use:

  • Homemade caramel

  • Store-bought caramel topping

  • Salted caramel for a flavor twist

Let the caramel drip naturally down the sides for a beautiful presentation.


💡 Tips for the Best Pound Cake

  • Use room-temperature ingredients for smooth blending.

  • Don’t rush the creaming process—airiness = a lighter crumb.

  • Bake at a lower temperature for an even rise and moist center.

  • Allow the cake to rest before slicing to maintain structure.


🎉 Perfect for Any Occasion

This Caramel Cream Cheese Pound Cake is:

✔ Moist and buttery
✔ Elegant enough for celebrations
✔ Easy to make with pantry staples
✔ Loved by kids and adults alike

Whether served with coffee, topped with whipped cream, or enjoyed on its own, it’s always a crowd-pleaser.

⭐ Creamy Fruit Salad Recipe – A Refreshing, Irresistible Treat 😋🤤

If you’re looking for a quick, delicious, and colorful dessert or snack, this Creamy Fruit Salad is the perfect choice. Packed with fresh fruits like mango, pineapple, and kiwi, this salad combines natural sweetness with a rich and silky cream base. It’s ideal for parties, Ramadan iftar, family gatherings, or simply as a refreshing treat on a warm day.


🥗 What Makes This Creamy Fruit Salad Special?

This fruit salad isn’t just tasty—it’s nutritious, refreshing, and incredibly easy to prepare. The combination of tropical fruits and creamy dressing creates a balance of textures and flavors that everyone loves.
Mango adds natural sweetness and a buttery texture.
Pineapple brings a juicy, tangy kick.
Kiwi contributes a fresh, slightly tart flavor that balances the sweetness beautifully.


🛒 Ingredients (Serves 2–3)

  • 🥭 1 cup mango cubes (150 g)
    Sweet, juicy, and vibrant.

  • 🍍 1 cup pineapple chunks (150 g)
    Adds refreshing acidity and crunch.

  • 🥝 1 kiwi, sliced
    Provides color contrast and a touch of tartness.

Optional additions:

  • Fresh raspberries or strawberries

  • Grapes or pomegranate seeds

  • Cream, yogurt, or condensed milk for extra richness

  • Nuts like almonds or pistachios for crunch


👩‍🍳 How to Make Creamy Fruit Salad

  1. Prepare the fruits:
    Wash, peel, and cut the mango, pineapple, and kiwi into bite-sized pieces.

  2. Combine in a bowl:
    Place all the fruits into a large mixing bowl.

  3. Add the cream layer:
    You may use:

    • Whipped cream

    • Greek yogurt

    • Thick fresh cream

    • A mix of cream + condensed milk for extra sweetness

  4. Mix gently:
    Coat the fruits evenly without mashing them.

  5. Chill before serving:
    Refrigerate for at least 20–30 minutes for the flavors to blend perfectly.


🍨 Serving Suggestions

  • Serve in a glass bowl or dessert cups for an elegant look.

  • Add a drizzle of honey if you prefer extra sweetness.

  • Top with mint leaves for freshness.

  • Sprinkle nuts for extra crunch.


💡 Why You’ll Love This Salad

✔ Quick and easy
✔ Perfect for any season
✔ Kids-friendly
✔ Healthy and nutrient-rich
✔ Beautiful presentation for guests

How to Naturally Eliminate Dust Mites and Bedbugs from Your Mattress

A Cleaner, Healthier Mattress: Natural Ways to Eliminate Dust Mites & Bedbugs

A fresh and hygienic sleeping environment is essential for maintaining good health. Unfortunately, mattresses can easily become home to dust mites and bedbugs—two common household pests that trigger allergies, skin irritation, and restless nights. Below is a complete guide to understanding why these pests appear and how to eliminate them naturally using safe, eco-friendly methods like baking soda, steam, essential oils, and more.

What Are Dust Mites and Bedbugs?

Dust Mites

  • Dust mites are microscopic organisms that flourish in warm, humid spaces.

  • They feed on dead skin cells from humans and pets, making mattresses, carpets, and pillows ideal habitats.

  • While they don’t bite, their droppings can trigger allergic reactions such as sneezing, itchy skin, watery eyes, and even asthma flare-ups.

Bedbugs

  • Bedbugs are tiny, reddish-brown insects that feed on human or animal blood while you sleep.

  • They hide in seams, cracks, mattress folds, and furniture crevices.

  • Their bites result in red, itchy welts and can cause anxiety, stress, and disturbed sleep.


How Do These Pests Enter Your Mattress?

Dust Mites

  • Accumulation of dead skin cells on bedding

  • Humid indoor conditions

  • Infrequent washing of linens

  • Poor ventilation in sleeping areas

Bedbugs

  • Traveling on luggage, clothing, or secondhand furniture

  • Spreading from neighboring apartments or rooms

  • Bringing in uninspected thrift items


Natural Methods to Eliminate Dust Mites & Bedbugs


1. Baking Soda (Sodium Bicarbonate)

Baking soda is one of the most effective natural remedies for both dust mites and bedbugs. It has strong dehydrating and antibacterial properties, making your mattress less hospitable for pests.

How Baking Soda Works

  • Absorbs moisture, drying out dust mites and bedbugs

  • Neutralizes odors caused by droppings and bacteria

  • Penetrates deep into fabrics and cracks where pests hide

  • Offers mild antibacterial benefits, helping prevent mold and mildew

How to Use It

  1. Sprinkle a generous amount of baking soda over your mattress.

  2. Let it sit for 2–3 hours (or longer for best results).

  3. Vacuum thoroughly using a HEPA filter vacuum.

  4. Repeat every 1–2 weeks for continuous protection.


🌿 Natural Insect-Repellent Spray

This simple, eco-friendly spray can help repel bedbugs, dust mites, ants, fruit flies, and other household pests.

Ingredients

  • 1 cup white vinegar

  • 1 cup water

  • 10 drops peppermint essential oil
    (You can substitute eucalyptus or lavender)

  • 1 tablespoon baking soda

  • Optional: 1 teaspoon liquid Castile soap

Instructions

  1. Combine water and vinegar in a spray bottle.

  2. Add baking soda slowly to avoid fizzing over.

  3. Add essential oils and soap.

  4. Shake gently.

How to Use

  • Spray corners, baseboards, around furniture, windows, and door frames.

  • For fruit flies: spray around drains and fruit bowls.

  • For bedbugs: spray mattress seams, edges, cracks, and surrounding areas daily.


2. Essential Oils

Certain essential oils have powerful natural insect-repellent properties.

Best Oils

  • Tea tree oil

  • Eucalyptus oil

  • Lavender oil

  • Peppermint oil

How to Use

  1. Mix 10–15 drops of essential oil with 1 cup of water.

  2. Spray lightly over your mattress (avoid soaking).

  3. Allow the mattress to fully dry before adding bedding.


3. Steam Cleaning

High heat kills dust mites, bedbugs, and even their eggs.

How to Use

  • Use a handheld steam cleaner to cover the mattress surface.

  • Concentrate on seams, edges, and crevices.

  • Allow the mattress to dry completely before use.


4. Diatomaceous Earth (DE)

Diatomaceous Earth is a natural, non-toxic powder made from fossilized algae. It works by dehydrating pests without harmful chemicals.

Why Use DE?

  • Safe for humans and pets

  • Effective at killing dust mites, bedbugs, fleas, and ants

  • Works in cracks, seams, and fabric fibers

14 Ingenious Ways Onions Can Improve Your Health at Home

Did you know that many adults over 40 start noticing changes in how energized, strong, and resilient they feel?

Now imagine slicing into a fresh onion, the scent instantly filling your kitchen — a simple reminder that everyday foods can offer surprising wellness benefits.

Before we dive in, rate your current sense of vitality from 1 to 10.
Got your number?

If you’re over 30, you’ve probably experienced those annoying little issues — stiffness, low energy, or feeling “off” for no clear reason. What if one humble kitchen staple could support your well-being in unexpected ways?

Stay with me as we explore 14 fascinating, practical ways onions can contribute to a healthier lifestyle. Some of these will truly surprise you.


The Overlooked Impact of Everyday Wellness Struggles

As we move through our 40s, it’s common to feel shifts in our energy, comfort, and overall balance. Maybe it’s more frequent colds, lingering aches, or just feeling less vibrant than before.

A lot of people turn to quick fixes — trendy supplements, restrictive diets, or over-the-counter remedies — but these often miss the bigger picture: long-term habits and simple, natural ingredients can make a difference too.

When was the last time you checked in with your overall wellness on a 1–5 scale?
If you’ve been feeling a bit worn down, don’t worry — there are gentle, natural approaches that may help you feel more supported.


Way #1: Using Onion Juice as a Comfort Boost for the Immune System

Ever had that feeling that a cold might be coming on?
Many people use onion-based home remedies as a traditional way to support comfort during seasonal changes.

Onions contain natural antioxidants, including quercetin, which is widely known for its protective properties. Some people mix small amounts of diluted onion juice into warm drinks as part of their wellness routine.

Try rating your immune resilience from 1 to 10.
If you feel like you could use a boost, this might be a simple option to explore.


Way #2: Warm Onion Compress for Joint Relief

Picture this: You’re enjoying your day, gardening or working, when persistent joint discomfort slows you down.

Warm onion compresses have been used in various cultures as a soothing, home-based remedy to help ease tension in sore areas. While not a medical treatment, many people find the warmth and natural compounds in onions comforting.

How often do you experience joint discomfort on a 1–5 scale?
If you’re curious about natural approaches, this one might be worth trying.

Don’t Lose This Recipe Recipe in the first

Soft & Fluffy No-Oven Stovetop Bread: The Easiest Homemade Bread You’ll Ever Make

Imagine biting into warm, buttery bread that’s soft on the inside, golden on the outside, and made without ever turning on your oven. If you’ve been craving homemade bread but don’t want the hassle of yeast, kneading marathons, or long rising times, this stovetop bread is about to become your new favorite recipe.

This quick, beginner-friendly bread uses simple pantry staples and cooks right on your stovetop in under 20 minutes. Whether you’re in a small kitchen, avoiding oven heat, or just love a fast recipe — this one delivers every time.


Why Stovetop Bread Works So Well

Traditional bread requires yeast and time to rise. Stovetop bread skips all that by using baking powder, which creates instant lift and makes the dough puff up beautifully while cooking.

Combined with milk, egg, and butter, you get a texture that’s soft, fragrant, and slightly rich — almost like a cross between a dinner roll and a fluffy skillet cake.


Ingredients You’ll Need

  • 1 cup all-purpose flour

  • 1 teaspoon baking powder

  • 1/4 teaspoon salt

  • 1/4 cup unsalted butter, melted

  • 1/2 cup milk

  • 1 egg

That’s it — just six ingredients for perfect homemade bread.


How to Make No-Oven Stovetop Bread

1. Mix the Dry Ingredients

In a bowl, whisk together the flour, baking powder, and salt. This ensures the bread rises evenly and cooks with a uniform texture.

2. Add the Wet Ingredients

Pour in the melted butter, milk, and egg. Mix until a thick, smooth batter forms. The dough will be softer than traditional bread dough — that’s exactly what you want.

3. Prepare Your Pan

Lightly butter or oil a nonstick skillet. Warm it over low heat. A heavy pan works best because it distributes heat more evenly.

4. Cook Slowly on the Stovetop

Pour the batter into the skillet and smooth the top.
Cover with a lid — this traps steam and helps the bread rise.

Cook on low heat for 10–12 minutes, or until the bottom is golden and the top looks set.

5. Flip & Finish

Gently flip the bread (using two spatulas if needed) and cook for another 5 minutes uncovered, until the other side is golden brown.

6. Serve Warm

Brush with butter, slice, and enjoy!
The texture is fluffy, slightly sweet, and unbelievably good.


Ways to Enjoy This Bread

  • Spread with butter and honey

  • Serve with eggs for breakfast

  • Pair with soup, stew, or pasta

  • Turn into mini sandwiches

  • Add herbs or cheese to the batter

You can even sprinkle sesame seeds or garlic butter on top for extra flavor.


Why You’ll Love This Recipe

✔ No oven needed
✔ No yeast required
✔ Ready in minutes
✔ Soft, golden, and delicious
✔ Perfect for beginners

If you’ve been wanting to try homemade bread but didn’t know where to start, this stovetop version is your fail-proof introduction.

Revitalize Your Health: The Ultimate Beetroot & Lemon Detox Elixir

Kickstart your digestion, nourish your body, and enjoy a boost of natural energy with this bold, ruby-colored wellness drink. The earthy flavor of beetroot blends with bright lemon and warming ginger to create a refreshing mix that supports overall digestive comfort and vitality.

Why This Drink Feels Good for Your Body

This isn’t just a simple juice—it’s a purposeful combination of produce chosen to support gentle cleansing and balanced wellness.

  • 🍋 Lemon & Ginger: Add brightness and warmth while supporting healthy digestion.

  • 🧡 Beetroot & Carrots: Naturally rich in fiber and antioxidants that contribute to regularity and overall gut wellness.

  • 🍎 Apples & Kale: Provide soluble fiber and an array of vitamins for daily nourishment.

Great as a morning pick-me-up, a light pre-meal drink, or a refreshing cooldown after activity.

🧾 Ingredients

(Organic produce recommended when possible)

  • 6 kale leaves (stems removed)

  • 3 carrots (peeled)

  • 2 red apples (cored and chopped)

  • 1 beet (peeled and chopped)

  • ½ lemon (peeled, seeds removed)

  • 1-inch piece fresh ginger (peeled)

  • Ice (optional)

👩‍🍳 How to Make It

  1. Prep: Wash and chop everything into small pieces for smoother blending or juicing.

  2. Juice Method: Run all ingredients through your juicer.

  3. Blender Method: Combine everything with about ½ cup water. Blend until fully smooth, then strain through a nut-milk bag or fine mesh sieve.

  4. Serve: Enjoy immediately, over ice if you prefer.

⭐ Ingredient Highlights

IngredientMain BenefitWhy It Helps
BeetrootGentle digestive supportNaturally high in fiber and antioxidants
LemonBrightens digestionProvides vitamin C and a refreshing acidity
GingerEases digestive discomfortKnown for its soothing, warming properties
KaleSupports gut balanceContains prebiotic fiber
Carrots & ApplesNatural energy liftSupply soluble fiber and vitamins

What This Drink May Help With

  • Encouraging regular digestion

  • Supporting natural energy

  • Providing antioxidants

  • Offering vitamins A, C, and K

  • Promoting overall wellness and hydration

⚠️ Notes & Who Should Be Cautious

Avoid this drink if you have:

  • Gastric ulcers

  • Severe acid reflux/GERD

  • Citrus or beet allergies

If you have kidney concerns or take regular medications, check with a healthcare professional before adding concentrated vegetable juices to your routine.
Enjoying this 2–3 times weekly is generally enough to get the benefits without overdoing ingredients like beets or kale.

Classic Halal Beef Pot Roast with Mashed Potatoes & Gravy

📜 Ingredients

1.5 kg (about 3.3 lbs) Halal Beef Chuck Roast, trimmed

2 tablespoons olive oil

1 large yellow onion, chopped

Advertisement

3 large carrots, peeled and roughly chopped (for the pot roast)

2 stalks celery, roughly chopped

4 cloves garlic, minced

4 cups (about 960ml) halal beef broth

1/4 cup (about 60g) tomato paste

2 tablespoons halal Worcestershire sauce (or 1 tbsp soy sauce + 1 tbsp apple cider vinegar)

1 teaspoon dried thyme

2 bay leaves

Salt and freshly ground black pepper, to taste

2 tablespoons all-purpose flour or cornstarch (for gravy, optional)

1 kg (about 2.2 lbs) Russet or Yukon Gold potatoes, peeled and quartered (for mashed)

500g (about 1.1 lbs) baby potatoes, halved

3 large carrots, peeled and cut into thick sticks (for roasting)

400g (about 14 oz) fresh green beans, trimmed

1/2 cup (113g) unsalted butter, softened

1/2 cup (120ml) warm milk or cream

Drizzle of olive oil (for roasting vegetables)

📝 Instructions

Season the Halal beef chuck roast generously with salt and black pepper. Heat 2 tablespoons of olive oil in a large Dutch oven or oven-safe pot over medium-high heat. Sear the beef on all sides until deeply browned, about 3-4 minutes per side. Remove beef from the pot and set aside.
Add the chopped onion, the first batch of roughly chopped carrots, and celery to the pot. Sauté for 5-7 minutes until softened. Stir in the minced garlic and cook for another minute until fragrant.
Stir in the tomato paste, dried thyme, and bay leaves. Cook for 2 minutes, stirring constantly. Pour in the halal beef broth and halal Worcestershire sauce (or alternative blend), scraping up any browned bits from the bottom of the pot. Bring to a simmer.
Return the seared beef roast to the pot. Ensure it’s mostly submerged in the liquid. Cover the Dutch oven and transfer to a preheated oven at 160°C (325°F) for 3-4 hours, or until the beef is incredibly fork-tender.
While the roast cooks, prepare the potatoes for mashing: Place the peeled and quartered potatoes in a large pot, cover with cold salted water, bring to a boil, then reduce heat and simmer until very tender (15-20 minutes). Drain well.
For roasted vegetables: In a large bowl, toss the halved baby potatoes and the second batch of carrots cut into sticks with a drizzle of olive oil, salt, and pepper. Spread them evenly on a baking sheet. During the last hour of the pot roast’s cooking, add the roasted vegetables to the oven. Cook until tender and slightly caramelized, about 45-60 minutes.
For green beans: Steam or blanch the trimmed fresh green beans until crisp-tender, about 3-5 minutes.
Once the beef is fork-tender, carefully remove it from the pot and transfer it to a cutting board. Tent with foil and let it rest for 10-15 minutes before shredding or slicing.
To make the gravy: Skim off any excess fat from the liquid in the Dutch oven. If desired, strain out the cooked vegetables for a smoother gravy or blend them into the sauce for a thicker, more rustic consistency. For a smooth gravy, whisk 2 tablespoons of flour or cornstarch with a little cold water to form a slurry, then gradually whisk into the simmering liquid until thickened to your desired consistency. Taste and adjust seasoning.
Mash the cooked potatoes with softened butter and warm milk/cream until smooth and fluffy. Season with salt and pepper to taste.
Serve the shredded or sliced beef with generous spoonfuls of the rich gravy, alongside creamy mashed potatoes, tender roasted baby potatoes, caramelized carrots, and vibrant green beans. Enjoy your delicious, homemade feast!

Scroll to Top